Peter Fynne (talk | contribs) |
Peter Fynne (talk | contribs) |
||
| Line 17: | Line 17: | ||
====Malicious Mace==== | ====Malicious Mace (db+2) ==== | ||
---- | ---- | ||
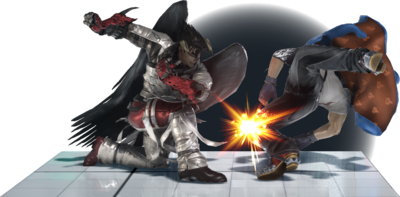
[[File:DJDB2.png|left|Devil Jin's main high crush tool|400px]] | [[File:DJDB2.png|left|Devil Jin's main high crush tool|400px]] db+2 is an excellent low to use at close range. Its crush property allows Devil Jin to slip under highs, thus allowing him to bypass jab pressure. On hit Devil Jin is left at an advantage of +3, which allows him to follow up with either an uninterruptable ws+4 or and in the occasion that you Counter-Hit the opponent, it leads to a knockdown state into a guaranteed follow up. | ||
{| class="wikitable" style="text-align: center;" | |||
| | |||
|- | |||
! Damage !! Guard !! Startup !! Hit !! On-Block !! Counter-Hit | |||
|- | |||
|15||Low||22-23||+3||-13||KND | |||
|} | |||
---- | ---- | ||
Revision as of 00:49, 16 August 2022
| Devil Jin (Tekken 7) |
|---|
General Strategies
Round Start Options
Although Devil Jin Boasts one of the most well rounded movesets in the game, one of his few weaknesses is that he lacks a traditional magic four, and, thus his fastest Counter-Hit launcher has a relatively slow start up animation at 15 frames.
Neutral
Mid Range
Close Range
Although Devil Jin Boasts one of the most well rounded movesets in the game, one of his few weaknesses is that he lacks a traditional magic four, and, thus his fastest Counter-Hit launcher has a relatively slow start up animation at 15 frames. Because of this, he can have trouble outpoking characters with strong Counter-Hit game such as Steve or Lee at close range. With this in mind, it's usually best to be cautious during most exchanges, even when at a slight advantage when against such characters.
Malicious Mace (db+2)

db+2 is an excellent low to use at close range. Its crush property allows Devil Jin to slip under highs, thus allowing him to bypass jab pressure. On hit Devil Jin is left at an advantage of +3, which allows him to follow up with either an uninterruptable ws+4 or and in the occasion that you Counter-Hit the opponent, it leads to a knockdown state into a guaranteed follow up.
| Damage | Guard | Startup | Hit | On-Block | Counter-Hit |
|---|---|---|---|---|---|
| 15 | Low | 22-23 | +3 | -13 | KND |
Long Range
Defense
Counter Poking
Pressure
Mix-Ups
Throw Game
Wall Pressure
Okizeme
Key moves
| Function | |
|---|---|
| Core | |
| Secondary | |
| Extra | |
| Move | Poke | Counter | Mixup | Keepout | Approach | Oki | |
|---|---|---|---|---|---|---|---|
| 1 |
- 1
- Jab is good okay.
- d+4